Steps 1–3: Name & Description, Provider & Protocol, App Parameters
Overview
This page describes the first 3steps of the application configuration flow.
These steps are used when:
- Creating a new application in advanced mode
- Editing an existing application.
See Also:
This part of the flow includes:
- Name & Description: Define the application’s basic details and categorization
- Provider & Protocol: Select where the resource is hosted and how users connect to it
- Application Parameter: Configure how the application connects to the resource and how it is exposed to users
Step 1: Name & Description
Define the basic details of the application.
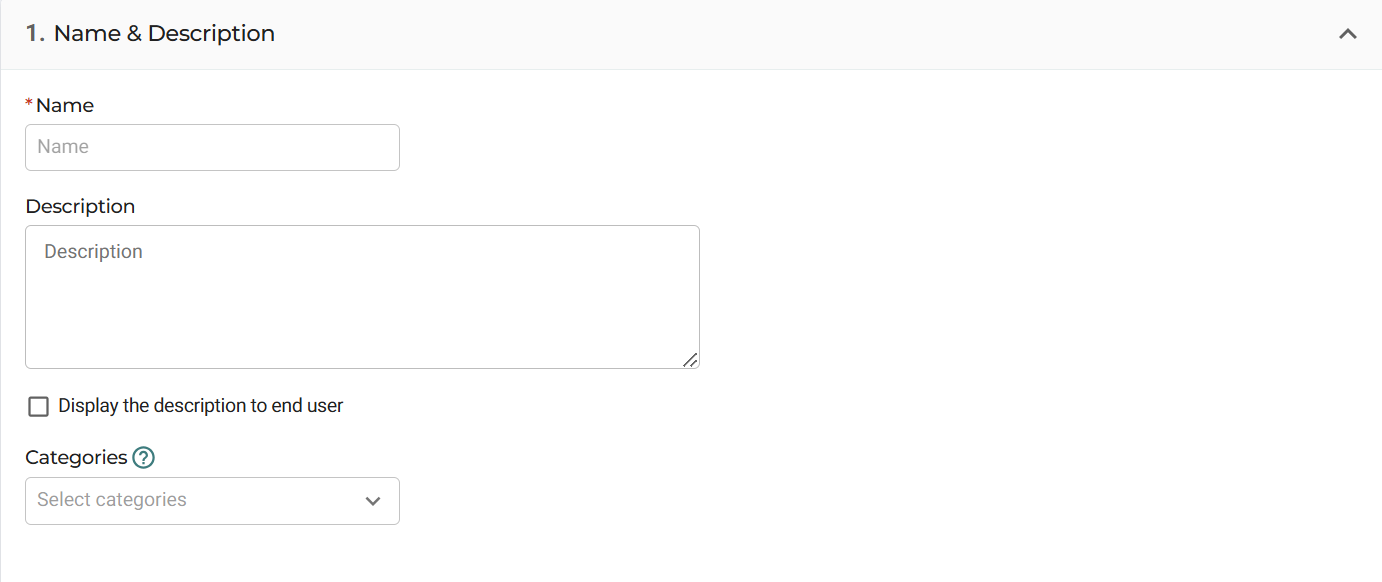
- Name: The display name of the application
- Description: Optional descriptive text
- Display the description to end user: Controls whether the description appears in the Application Portal
- Categories: Assign the application to categories
Categories can be used to organize applications and may affect rule inheritance.
Step 2: Provider & Protocol
Select where the resource is hosted and how users connect to it.
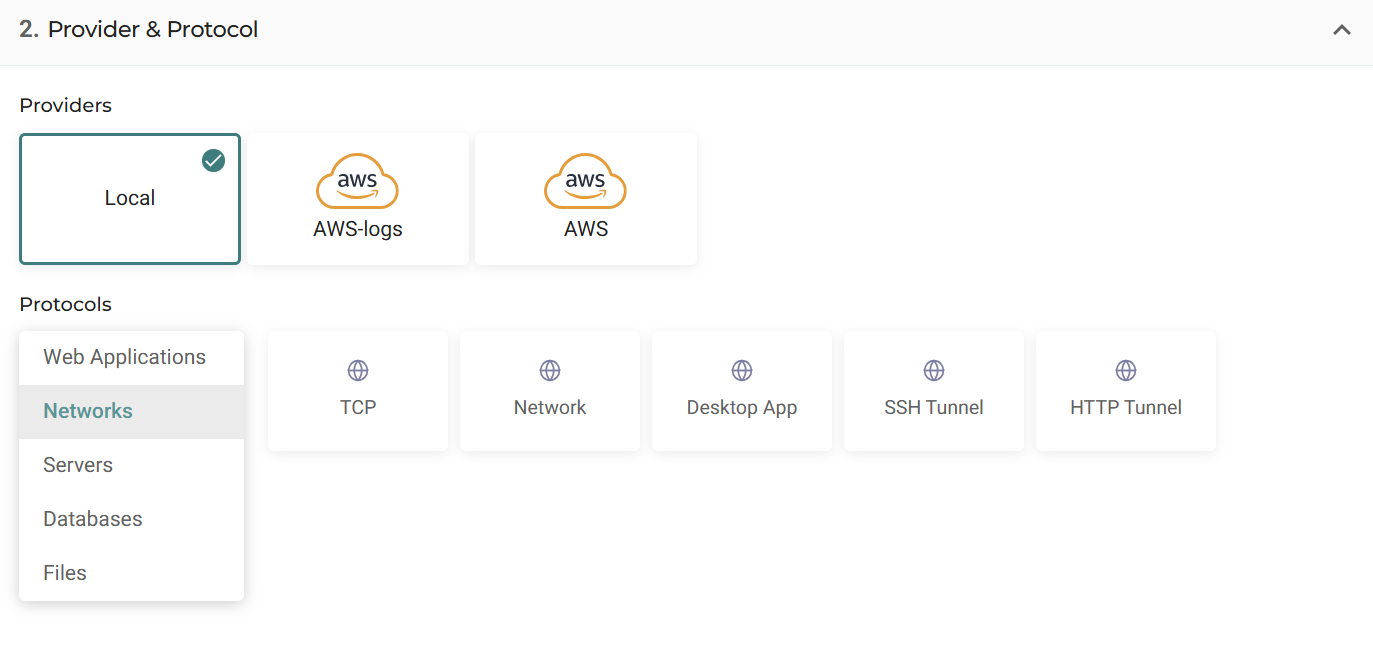
- Provider: Select the hosting environment, such as Local, AWS-logs, or AWS
- Protocol category: Select the resource type
- Connection type: Select the protocol within that category
Depending on the selected connection type, additional fields may appear, such as port settings or protocol-specific options.
See further details about specific Protocols here .
Step 3: Application Parameters
Configure how the application connects to the resource and how it is exposed to users.
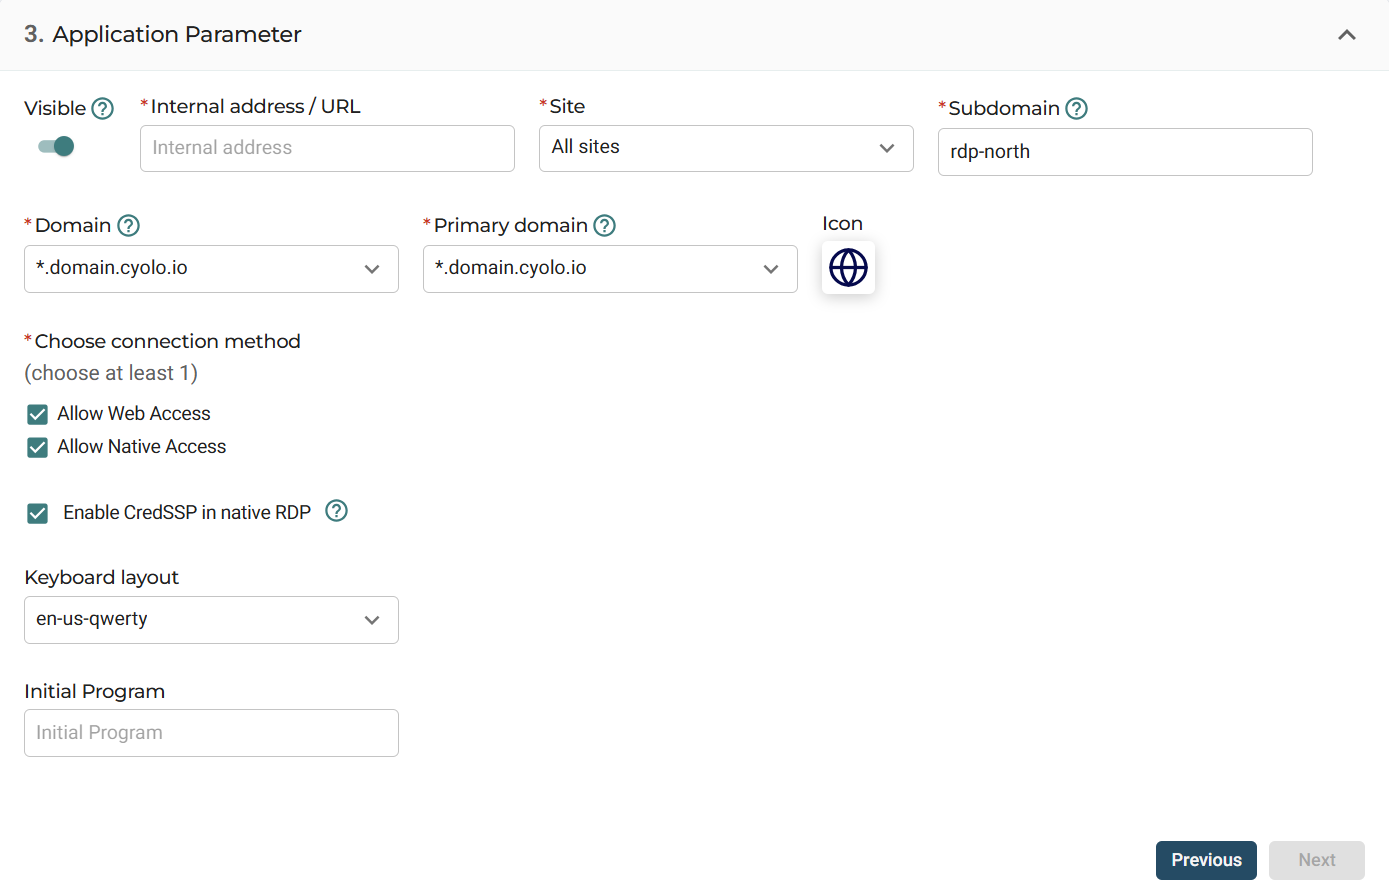
General Settings
- Visible: Controls whether the application appears in the Application Portal
- Internal address / URL: The internal IP address, hostname, or URL of the resource. The address must be reachable from the IDAC
- Site: Determines which IDACs publish the application. Selecting All sites makes the application available across all current and future IDACs
- Subdomain: The application-specific prefix used to construct the external URL. See note below for setting this field for- SSH Tunnel Configuration.
- Domain: The domain used to publish the application. Wildcard domains can be used for multiple applications
- Primary domain: The main domain used for the application
- Icon: The icon displayed in the Application Portal
- Home Directory: The default path for supported applications
HTTP/S Translate Settings
Configure how requests and responses are rewritten between external and internal addresses.
- Translate request body
- Translate request header
- Translate response body
- Translate response header
- Translate request query parameters
Custom Headers
Add custom HTTP headers to requests and responses.
- HTTP Custom Request Headers: Headers added to requests sent to the application
- HTTP Custom Response Headers: Headers added to responses returned to the user
Additional Settings
- Keep Content Security Policy headers: Keeps the original Content-Security-Policy header from the upstream server
- Add X-Forwarded headers: Adds X-Forwarded-* headers to the request
- Send client certificate: Sends a client certificate to the server during mutual TLS authentication
Note on Internal Address/URL
For SSH Tunnel connections, you can configure multiple destination IP addresses and ports in the Internal address / URL field.
- Format:
localPort:destinationIP:destinationPort - Separate multiple entries with commas or semicolons
- When multiple mappings are defined, the generated SSH command includes all configured addresses and ports
Example
8080:192.168.0.2:80; 8443:192.168.0.2:443; 3306:192.168.0.10:3306Maps:
- Local port 8080 → 192.168.0.2:80
- Local port 8443 → 192.168.0.2:443
- Local port 3306 → 192.168.0.10:3306
Supported formats
-
192.168.1.1
Uses the port defined in the Port field for both local and destination -
192.168.1.1:3389
Uses port 3389 for both local and destination. The Port field is ignored -
4567:192.168.1.1:3389
Local port 4567 maps to destination port 3389. The Port field is ignored -
4567:192.168.1.1:3389, 4545:192.168.2.2:3330
Multiple mappings. The Port field is ignored