Adding Application Categories
Categories help both users and admins organize applications into groups based on functionality, purpose, convenience, or any other parameter that the end user or administrator may deem necessary. Both end users and portal admins can create categories. End users can create categories on their respective Applications Portal. Portal admins can create it on the admin portal. Applications added to a category inherit the following settings configured in the category:
-
Identity
-
Supervision and Audit roles
-
Rules Conditions and Action profiles.

On the Applications page, click the drop-down alongside the Add button in the top right corner of the screen and click Category.
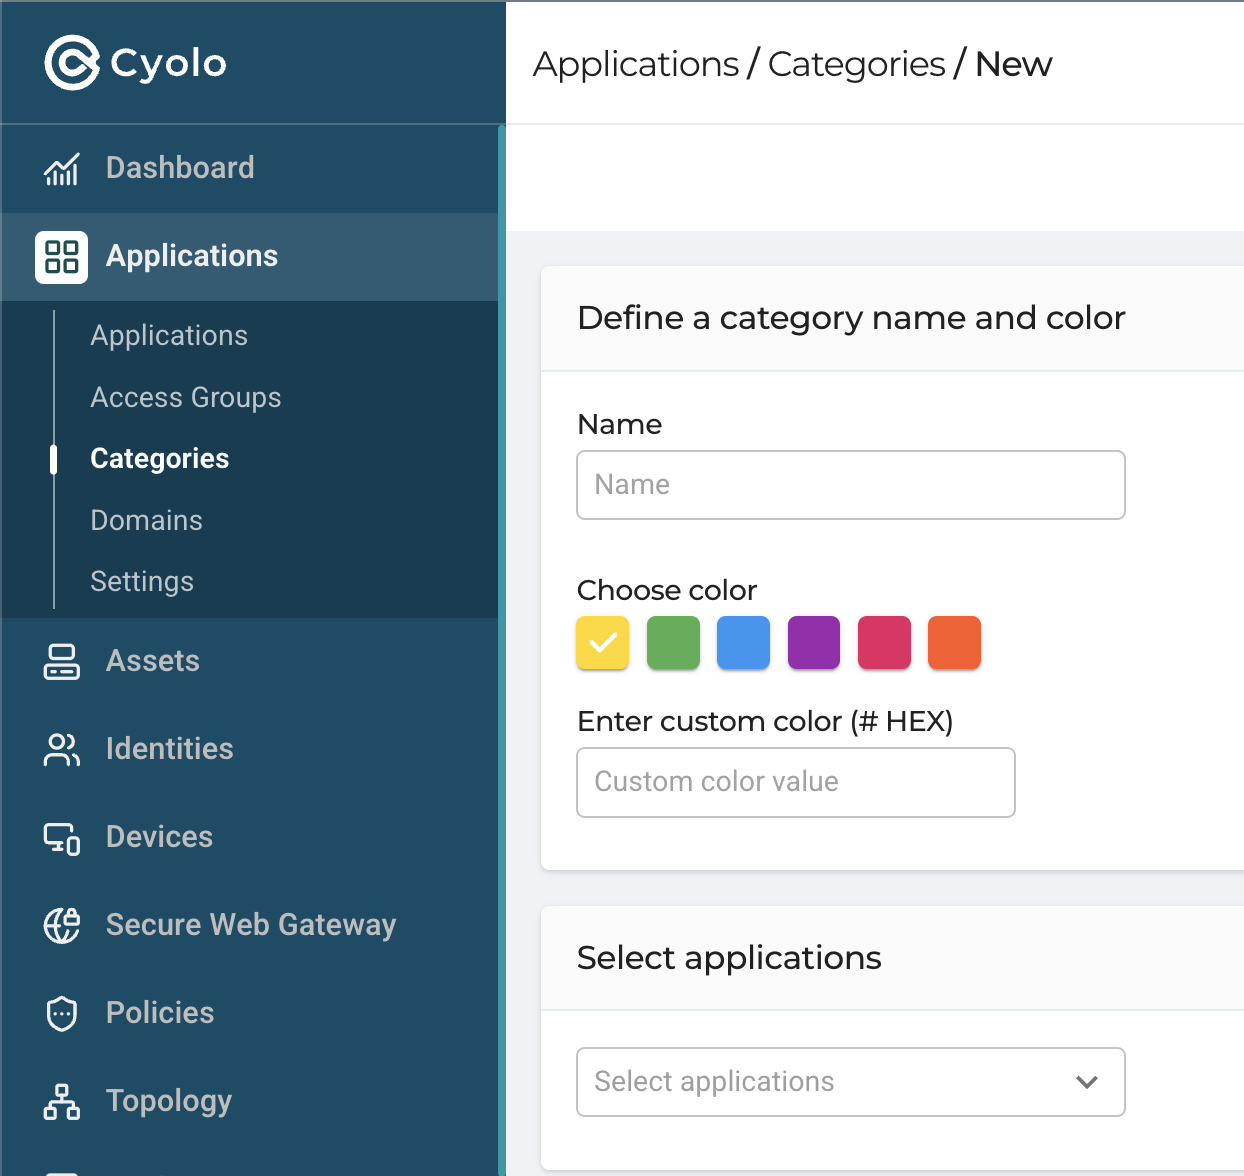
Define a category name and color - Enter a name for the category and choose a color from the palette displayed. Or enter a colour scheme in the box, like in this example: #2C001E
Show in Applications Portal - Enable this checkbox to display the category on the applications portal.

Select applications - Click the drop-down and select the applications that will be members of this category.

Identities - The options selected here will be inherited by the applications added above. Click the drop-down for the options available:
-
None - No identities are selected. The admin can still set identities in individual applications or add them in the Rules section.
-
Anonymous identities - This action will allow any user with the application URL to access it without authentication.
-
Any authenticated identity - The application will be displayed to any user who is authenticated by the Cyolo platform to the application portal.
-
Specific identities - Select users, user groups, or API keys to give them access to the applications in the category.
For more information on Identities, refer to the section: Identities


Supervision and Auditing Roles - By default, the approver, active supervisor, and observer supervisor selected here are those defined on their respective pages under the Roles menu. To assign these roles to users or user groups other than the default ones, uncheck the box, click the search box and select the users or user groups.
For more information on Supervision and Auditing, refer to the section: Supervision and Audit.

Rules - Rules are a combination of identities, conditions and actions profiles. For users to gain access to applications, they must fulfil all the conditions and requirements set forth in these features.
Rules created here are inherited by the member applications. If a rule is not created here, the admin must create rules individually when configuring the applications.
-
Click the + symbol to create a rule.
-
More than one rule can be defined here. When more than one rule is created, they are enforced in the order created. To re-order the rules, right-click and move them up or to the top.
-
Default properties of rules when created here:
-
The identities set in this rule are the same as the one set in the Identities section above.
-
The conditions defined in this rule are those in the default Conditions profile created on the Conditions page.
-
Based on the type of member applications, multiple default action profiles are defined in this rule. For example, if the applications added to this category are of types RDP, VNC, and SSH, the profiles will be the default profiles of these three application types - Default profile (RDP), Default profile (VNC), and Default pro- file (SSH).
-
-
To change the default properties, edit the rule.
-
Select the rule and click the Edit button.

-
In the Rule window, the default selection under Apply this rule to is Identities assigned this category.
-
Select the radio button The following identities to set identities here.
-
Click the Select identities drop-down and select the options displayed here. The steps to select are identical to that described in the Identities section.
-
Click the drop-down under Conditions to change the default profile to a custom profile. Custom profiles, if created on the Conditions page, are listed here. Click Create new condition to create a new Conditions profile.
For more information on Conditions, refer to the section: Conditions.
- Click the drop-down under Actions to change the default profiles selected. Custom profiles, if created on the Actions page, are listed here. Click the Create new action to create a new Action profile.
For more information on Actions, refer to the section: Policy Actions.

Back on the Applications > Category > New page, click Done to create the category.
Updated 3 days ago