IDAC - Basic Installation Procedure
Step 1: Installer Checks Prerequisites
In the first phase, the installation wizard checks the resources available on the machine on which you are installing the IDAC.
Helpful HintSee Working with the Installer Wizard for information that will help you navigate smoothly through the installation process.
Step 2: Download and Execute the Installation Wizard
- Copy the command below, paste it into the terminal, and press Enter:
bash <(curl -fsSL https://deploy.cyolo.io/get-cyolo)The installation package is downloaded and executed.
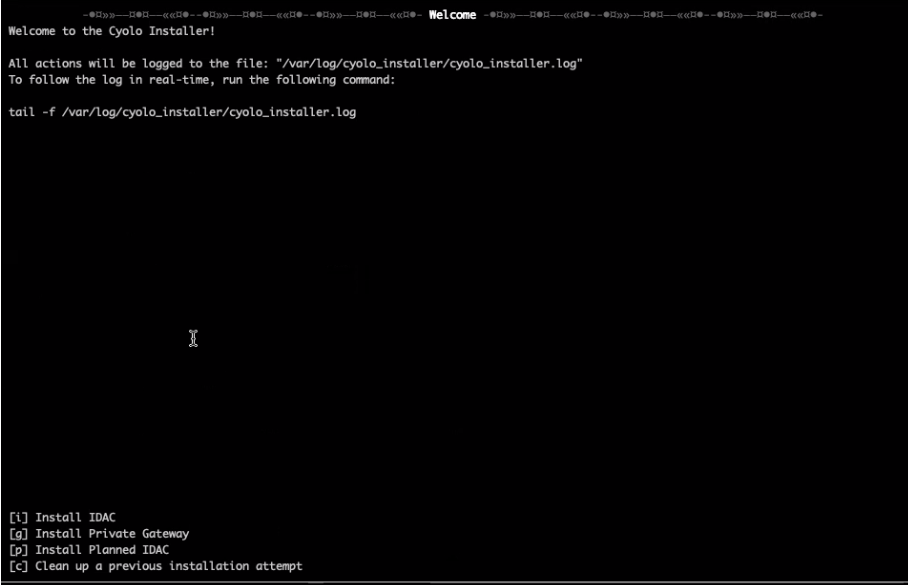
- Press the letter i on your keyboard.\
Step 3: Configuration Steps
Follow the Configuration steps in the table below.
| Step | Description | Notes |
|---|---|---|
| Enter Installation Path | ||
| Enter License Key | Copy the content of the license key file and paste it here. | The license is a jwt file. For details on uploading the license in a file, see the Command Line Installation Options. |
| Check for Existing Cluster | Check if there any existing IDAC instances on the machine. | |
| Confirm Cluster Creation or Joining |
| |
| Enter Upstream Address |
| Access to the host that resides at the upstream address is confirmed when you press enter. When a PG is used, an additional step appears that asks if you want IDAC to use the PG as a proxy for HTTP/S access to the internet. Type Y to accept this option. |
| Enter Upstream SNI | Default - tcp.cyolo.io | If you use a private gateway, enter its SNI. |
| Certificate Source Selection |
| If Yes, then you will be prompted to paste in the certificate See here for advanced details about working with your own certificate. |
| Enter Site Name | This name will be used in the UI whenever a site selection is required. | |
| Enter IDAC Name | For example, IDAC-01 | |
| System & App Analytics Preference | Type Y to allow Cyolo to receive your anonymous analytics data for service enhancement. | |
| Enter default admin password | This password can be changed later. | |
| Re-enter default admin password |
Step 4: Preparation, Launch and Post-Installation Phases
The installer will display the final setup steps and indicate pass or fail. No input is required.
- Set Installation Files and Directories
- Generate Certificates
- Install System Utilities
- System Administration Configuration
- Set Network Time Protocol
- Configure Docker Repository in Package Manager
- Install Docker
- Install Docker Compose
- Docker Container is Up
- Cluster Health Check
Updated about 1 year ago
Did this page help you?