For AI agents: visit https://docs.cyolo.io/llms.txt for an index of all pages formatted in Markdown and endpoints in OpenAPI.
- For an overview of device policies, refer to the section: Device Policies.
- The user must have admin privileges.
- Log in to the Cyolo Admin Portal.
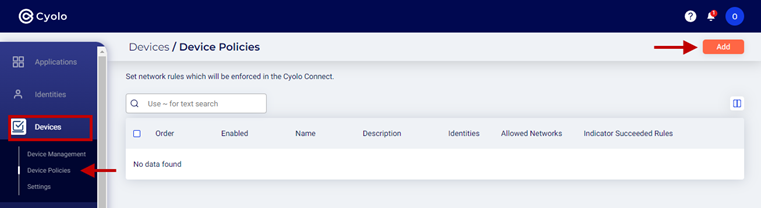
- Navigate to the Devices > Device Policies page.
- Click the Add button.
- Name and Description
● Enter a name for the policy.
● Optionally, enter a description.

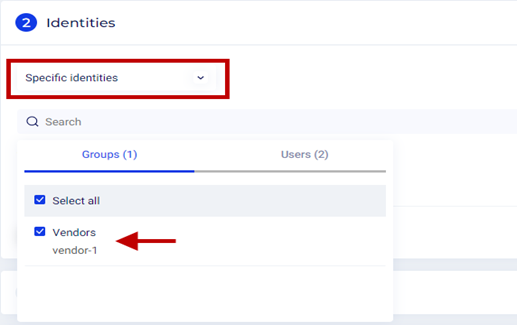
- Identities
● Click the Select Identities drop-down menu.
● Click Specific identities.
● Click the search box.
● Select user groups or users from the tabs.
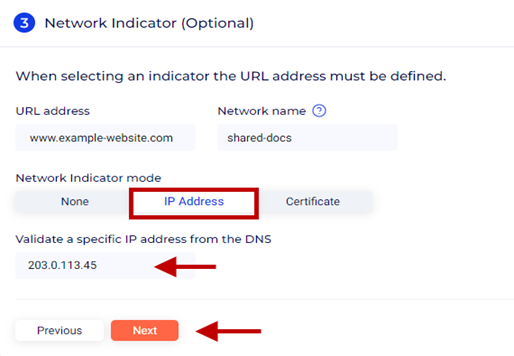
- Network Indicator (Optional)
When selecting an indicator, the URL address must be defined. Without specifying the URL, the ensuing Network Indicator mode options will not be displayed.
- URL address – Enter the URL that will be a good indicator of the type of network the Cyolo Connect agent is connected to.
- For example, a server that can be accessed from outside as well as inside the network will resolve to two types of IP address: one public and the other private. Based on this, it can be determined whether the device is located within the corporate network (private IP address), or outside it (public IP address).
- This is only one scenario. Another could be a public website that is known to be blocked within the corporate network. If the website resolves, it can be determined that the device is located outside the network.
- For the purposes of this article, we will enter a publicly accessible website.
- Network name – Enter the internal name of a resource. This will be used for connectivity checks.
- Click the IP Address tab under Network indicator mode.
- Validate a specific IP address from the DNS – Enter the expected IP address the URL entered above resolves to. The agent will perform name resolution of the URL entered above on the device’s network and will verify whether the resolved IP address matches the configured IP address here. If it matches, the indicator test is successful; if it does not, the test has failed.
- Click Next.
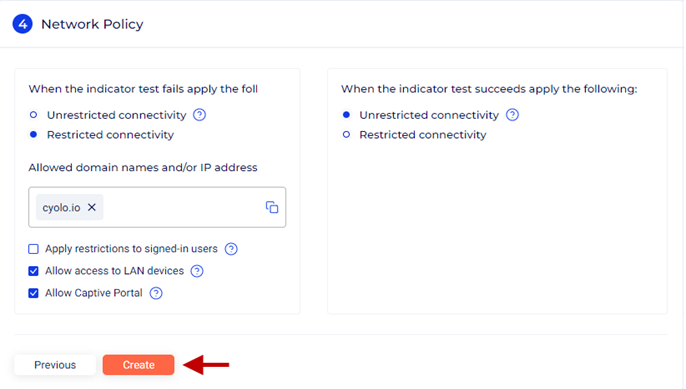
- Network Policy
- When the indicator test fails, apply the following:
- Select Restricted connectivity.
- Allowed Domain Names and/or IP Addresses box - Enter the URLs and/or IP address - separated by commas - of sites that are allowed to the user.
- Apply restrictions to signed-in users – Keep this option disabled.
- Allow access to LAN devices – Enable the checkbox.
- Allow Captive Portal – Enable this checkbox. Enabling this checkbox will temporarily allow outbound connection for enough time to log in to a captive portal.
- When the indicator test fails, apply the following:
- Select Unrestricted connectivity.