Configuring SAML IdP Integration
Overview
Security Assertion Markup Language (SAML) is a protocol for exchanging authentication and authorization data. It is used in Single Sign-On (SSO) processes involving an end-user (Principal), an Identity Provider (IdP), and a Service Provider (SP).
Okta (Okta Inc.) provides user authentication and single sign-on (SSO) mechanism to various platforms.
Integrating SAML with Cyolo enhances security and user experience. It extends Multi-Factor Authentication (MFA) to applications, allows access from a single IdP portal, and ensures secure access for third parties. Moreover, it conceals application traffic from the internet, reducing the attack surface.
Configuration
Create App Integration of Cyolo in Okta
-
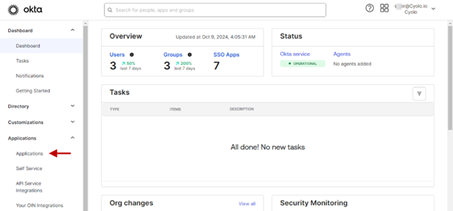
Log in to your Okta account.
-
On the Okta landing page, navigate to the Applications > Applications page.
-
Click Create App Integration.
-
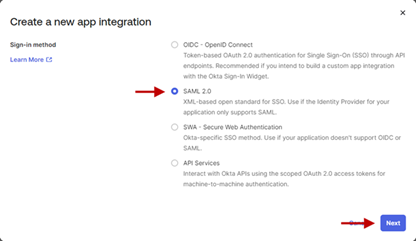
In the Create a new app integration window, select SAML 2.0 and click Next.
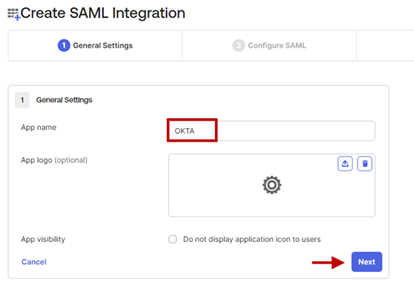
General Settings
- App Name - Enter a name for this integration in the App Name field.
- App logo - Optionally, upload the logo of your company.
- App visibility – Optionally, enable the Do not display application icon to users checkbox.
- Click Next.
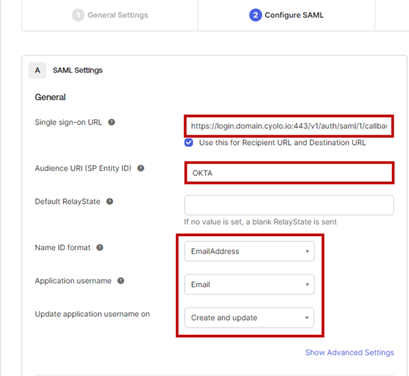
SAML Settings
- General
- Single sign-on URL - This is the URL of the location where the SAML assertion is sent with an HTTP POST. In this case, the URL is of Cyolo. The format is https://login.
<tenant>.cyolo.io:443/v1/auth/saml/1/callback, where<tenant>must be replaced with you tenant name. For this article, it is https://login.domain.cyolo.io:443/v1/auth/saml/1/callback.
Note: The numeral /1/ in the URL refers to the number of integration attempts done on the Cyolo admin portal. For example, for first time integration, the number is 1. If, for various reasons, the integration is deleted on the Cyolo admin portal, then when re-integrated, the number is 2. For subsequent integrations, the number is increased by one. This is true as long as the application is not deleted on the Okta admin portal.
- Enable the checkbox Use this for Recipient URL and Destination URL to use the same URL for recipient and destination URLs.
- Audience URI (SP Entity ID) – Enter the name entered in the App Name field above. The application-defined unique identifier that is the intended audience of the SAML assertion is most often the app name.
- Default RelayState – Keep this blank. If no value is set, a blank RelayState is sent.
- Name ID format – Select EmailAddress from the drop-down.
- Application username – Select Email. This determines the default value for a user's application username.
- Update application username on – Set it to the default Create and Update.
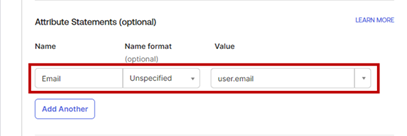
- Attribute Statements (optional)
- Name – Enter Email.
- Name format (optional) – Set it to the default Unspecified.
- Value – Enter user.email.
- Scroll down to the bottom of the page.
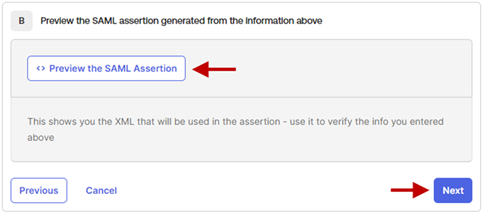
- Optionally, you can preview the settings by clicking Preview the SAML Assertion.
- Click Next.
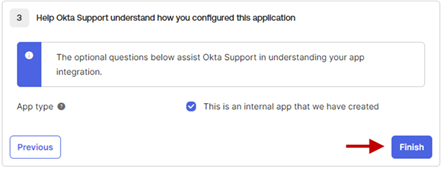
- Help Okta Support understand how you configured this application
- App type – Select This is an internal app that we have created radio button.
- Click Finish.
Sign on methods
At the bottom right side, under SAML Setup, click View SAML setup instructions.
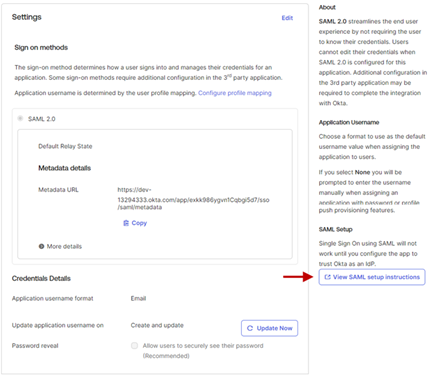
This will open the instructions on a new page. The information on this page is required to configure integration on the Cyolo admin portal. Copy the following and store them for later use:
- Identity Provider Single Sign-On URL
- Identity Provider Issuer
- X.509 Certificate
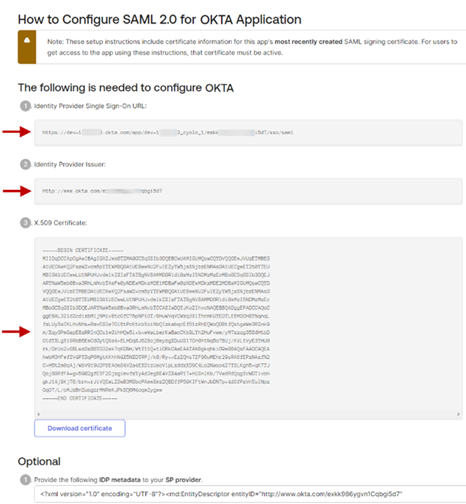
Note: You could download the certificate, but for our purposes, copy the certificate as displayed on the page in Base64-encoded format.
Assign User Groups
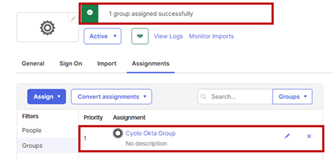
- Back on the Sign On tab, click the Assignments tab.
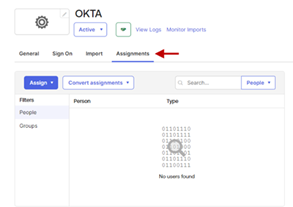
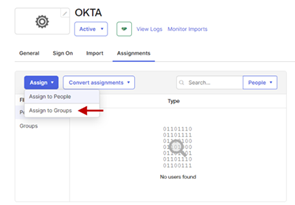
- Click the Assign drop-down and select Assign to Groups. You can select Assign to People to select individual users.
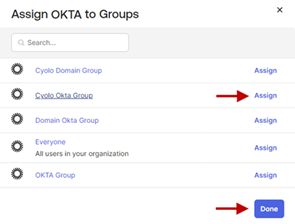
- Select the group to be assigned. For this article, we select a previously created group, Cyolo Okta Group. Assigning a group will allow the users within to log in via Okta.
- Click Done.
- The newly assigned group will be listed under Assignments > Groups.
Configuring SAML Integration (Using Okta) on the Cyolo Admin Portal
- Log in to the Cyolo admin portal.
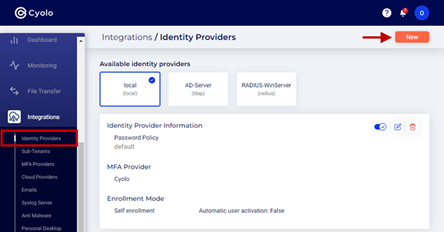
- Navigate to the Integrations > Identity Providers page.
- Click New.
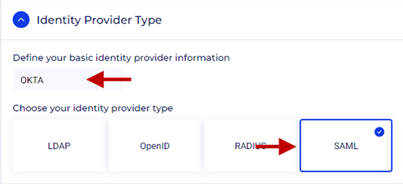
- Identity Provider Type
- Define your basic identity provider information – Enter a name for the IdP.
- Select SAML.
-
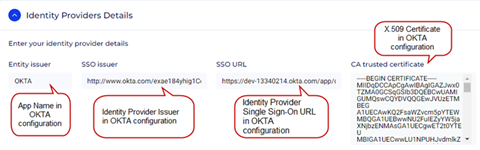
Identity Providers Details
- Entity issuer – Enter the app name defined when creating the application on the Okta page.
- SSO issuer – Copy and paste the Identity Provider Issuer generated on the Okta page.
- SSO URL – Copy and paste the Identity Provider Single Sign-On URL generated on the Okta page.
- CA trusted certificate – Copy and paste the X.509 Certificate generated on the Okta page.
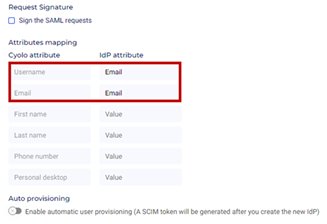
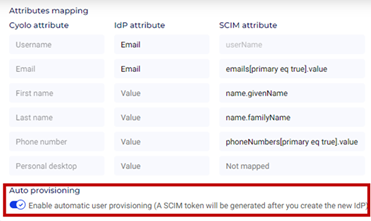
Attributes mapping
- Cyolo attribute – Username - Enter Email.
- IDP attribute - Enter Email.
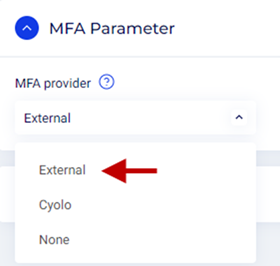
- MFA Parameter
- MFA provider – Click the drop-down and select External.
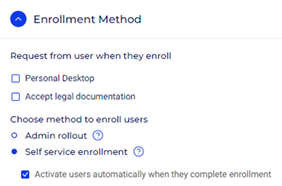
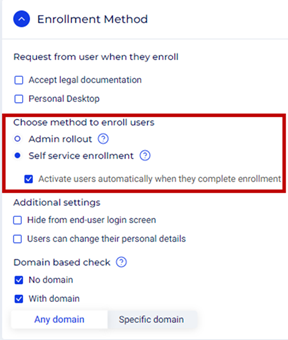
- Enrollment Method
Request from user when they enroll:
- Personal Desktop: Enable this checkbox if you want your users to be prompted for their personal desktop name or IP address.
- Accept legal documentation: Enable this checkbox if you want your users to be displayed on your company’s legal documentation - such as a license agreement. The document must be uploaded to the Configuration > Branding page.
Choose the method to enroll users:
- Admin rollout: The portal admin must create the users manually if this option is checked.
- Self service enrollment: The users will be added to the Identities > Users page after successfully authenticating and logging in for the first time. The following setting will be displayed if this option is selected:
- Activate users automatically when they complete enrollment: Enable this checkbox to automatically activate users after connecting for the first time. If this option is not checked, users will be added to the Identities > Users page in Inactive status until manually activated by the portal admin.
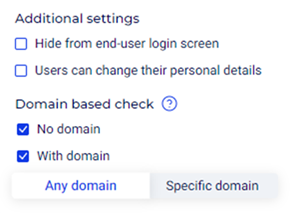
Additional Settings:
- Hide from end-user login screen: Optionally, enable this checkbox.
- Users can change their personal details: Optionally, enable this checkbox to allow end users to change their personal details on the Cyolo applications portal.
Domain based check:
-
No domain: Enabling this option will allow non-domain users to log in.
-
With domain: Enabling this option will display the following information:
-
Any domain: Users joined to any domain will be allowed to log in.
-
Specific domain: Specify one or more domain names so that only users joined to it will be allowed to log in. To enter multiple domains, press enter after each entry.
-
-
Click Create.
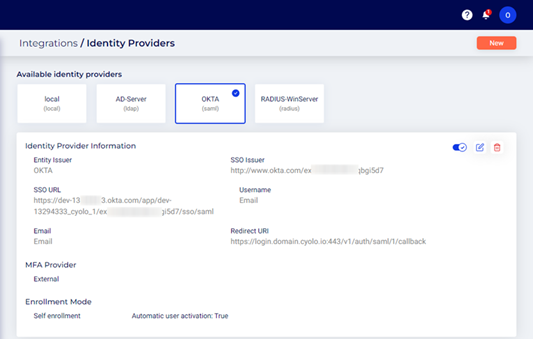
Once created the IdP will be displayed on the Identity Providers page:
User Experience
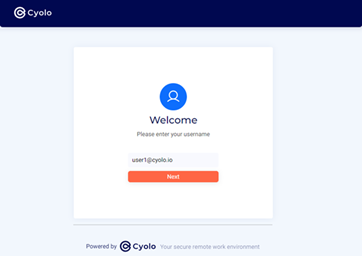
- Open the tenant URL and enter the username of a user in Okta.
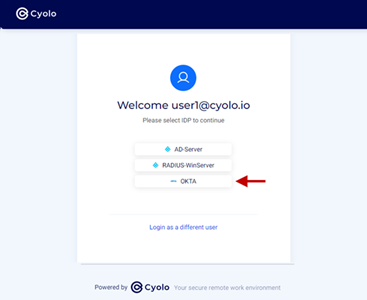
- When prompt to select IdP, select Okta.
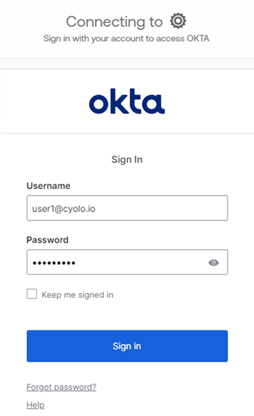
- Enter the Okta username and password.
- Enter the MFA code generated by either Google Authenticator or the Okta Verify app and click Verify.
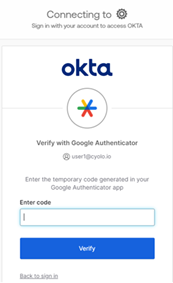
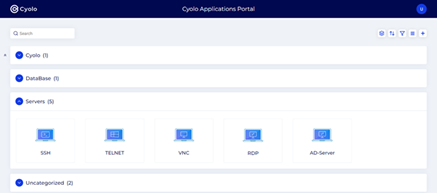
- If the configuration is correct, you will be able to log in to the Cyolo application portal.
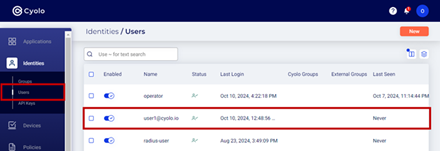
- The user,[email protected], will be listed on the Identities > Users page.
Enabling SCIM Auto Provisioning in Cyolo
Now that Okta has been added as an identity provider in Cyolo, you must enable automated provisioning based on the widely adopted SCIM 2.0 (System for Cross-domain Identity Management) protocol.
SCIM allows administrators to automatically provision user information from Okta into Cyolo and map user attributes to the corresponding attributes in Cyolo, ensuring that user information is synchronized between both platforms.
Supported Features
Cyolo supports the following provisioning features:
- User Creation: When users are assigned to the Cyolo application in Okta, they are automatically added to Cyolo.
- User Attribute Updates: Changes made to user attributes in Okta are automatically updated in Cyolo.
- User Deactivation: Removal or deactivation of users in Okta will disable the users in Cyolo.
Note: Changes made to user accounts in Okta will affect the corresponding accounts in Cyolo. However, changes made to user accounts in Cyolo will not affect the corresponding accounts in Okta.
Configuration
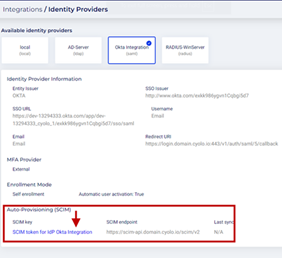
- On the Integrations > Identity Providers page of the Cyolo admin portal, select OKTA and click the Edit icon.

- Scroll down and enable the toggle button Enable automatic user provisioning (A SCIM token will be generated after you create the new IdP) under Auto provisioning in the Identity Providers Details section.
- In the Enrollment Method section, under Choose method to enroll users, select Self service enrollment and enable the checkbox Activate users automatically when they complete enrollment.
- Click Save to save the configuration.
- Clicking Save will display a window with the SCIM keys. The keys must be stored for later use when configuring SCIM provisioning in Okta.
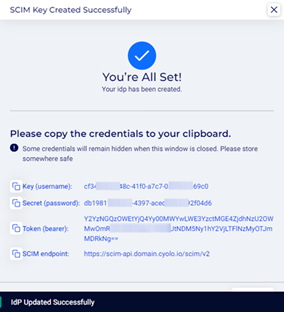
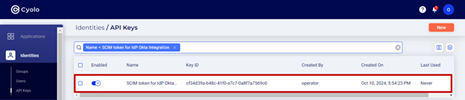
- Closing the window will lose access to the key for the end user; however, it can still be viewed on the Identities > API Keys page or by clicking the link, SCIM token for IdP Okta Integration, in the Okta IdP on the Identities page.
- SCIM token on the Identities > API Keys page.
Enabling SCIM Provisioning in Okta
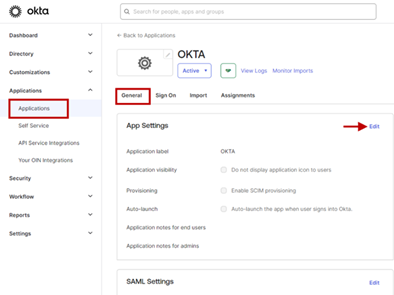
- Log in to your Okta account and navigate to the Applications page.
- Click the application for Cyolo.
- On the General tab, click the Edit button.
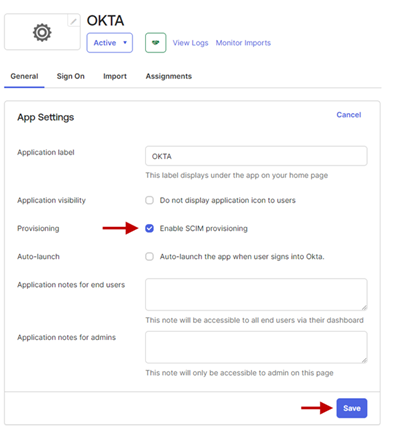
- Enable the Enable SCIM provisioning checkbox and click Save.
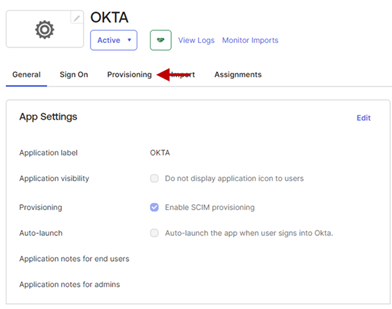
- Click the Provisioning tab.
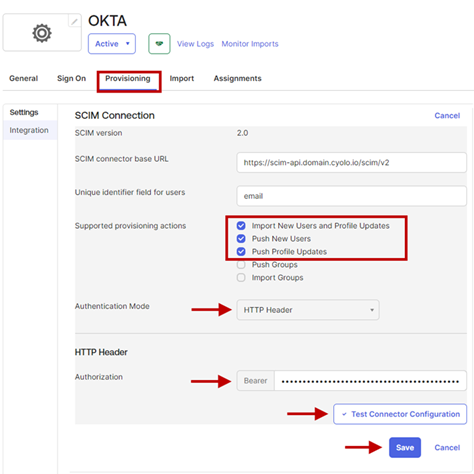
- Enable the following options in Supported provisioning actions:
o Import New Users and Profile Updates
o Push New Users
o Push Profile Updates - Select HTTP Header for Authentication Mode.
- For Authorization, copy the key named Token (bearer) from the set of tokens saved from the Cyolo admin portal and paste it in the Bearer box.
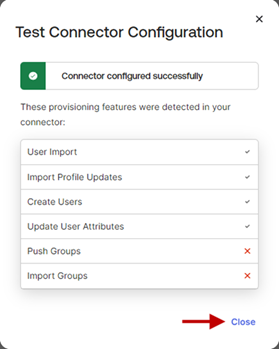
- Click Test Connector Configuration to test the configuration.
- A pop-up window with the status of the test will be displayed.
- Click Close to close the pop-up window.
- Back on the Provisioning page, click Save to save the configuration.
- You will be redirected to the Provisioning to App page under the Provisioning tab. Click the Edit icon.
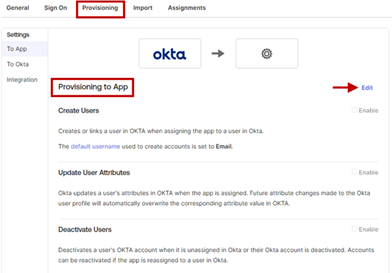
- Enable the following options:
o Create Users
o Update User Attributes
o Deactivate Users
o Click Save.

With SCIM provisioning enabled between Cyolo and Okta, the following is now possible:
- Users created in Okta after SCIM provisioning is enabled will be automatically added to the Cyolo platform on the Identities > Users page.
- Users deactivated or re-activated in Okta will be automatically disabled or enabled, respectively, in the Cyolo platform.
- Any changes made to users’ attributes in Okta will be updated in the Cyolo platform.