OpenID Integration
This article guides you through the process of setting up an OpenID identity provider (IdP) and configuring the IdP in the admin console.
The instructions for the first part of the procedure are different for each OpenID platform:
- Okta OpenID
- Azure AD OpenID
- ADFS OpenID
The second part of the procedure, Creating the OpenID Provider in Cyolo is identical for all.
Part 1: Setup in the OpenID Platform
Okta - Creating the Okta OpenID App
- Open your Okta tenant admin page at this address:
https://<tenant>.okta.com/admin/apps/active. Then, provide your username and password to log in.
- Click Add Application and select Web.
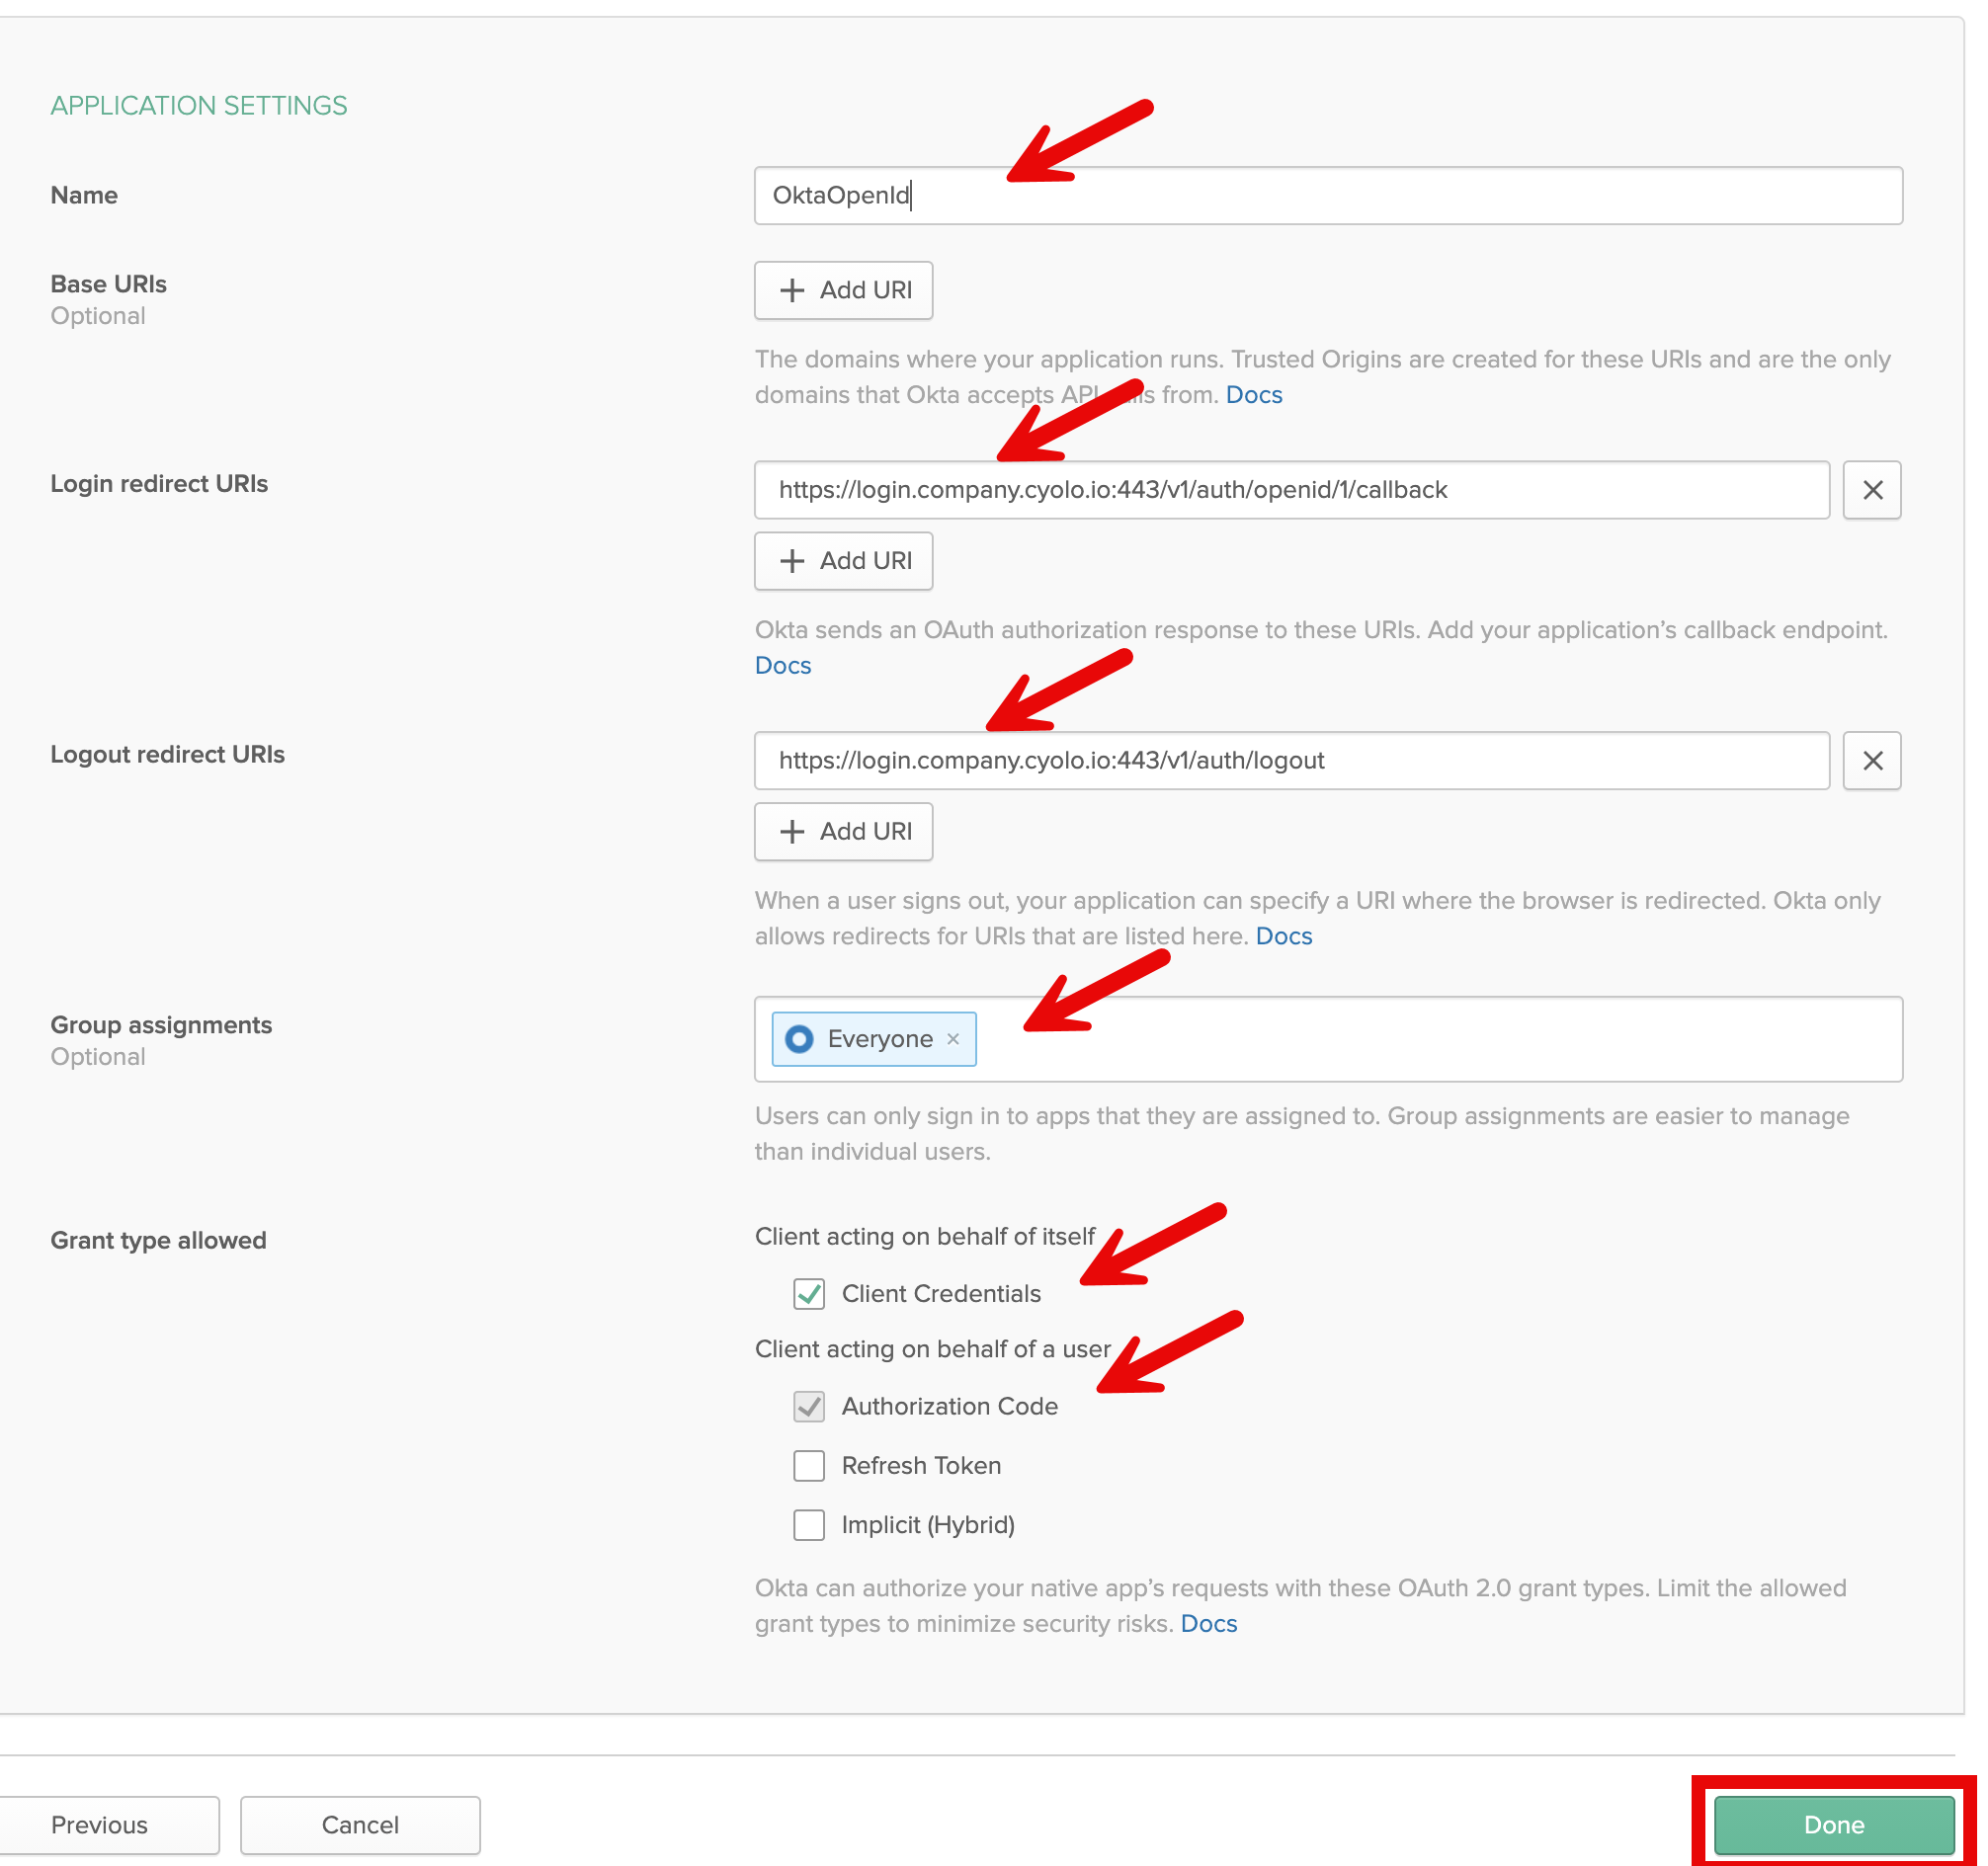
- Specify a name for the application.
- Specify the login redirect URI:
https://login.<tenant>.cyolo.io:443/v1/auth/openid/1/callback. - Specify the logout redirect URI:
https://login.<tenant>.cyolo.io:443/v1/auth/logout. - Group assignments - select an Okta group for this application.
- Mark Client Credentials.
Before you click Done, make sure that the form looks something like this:
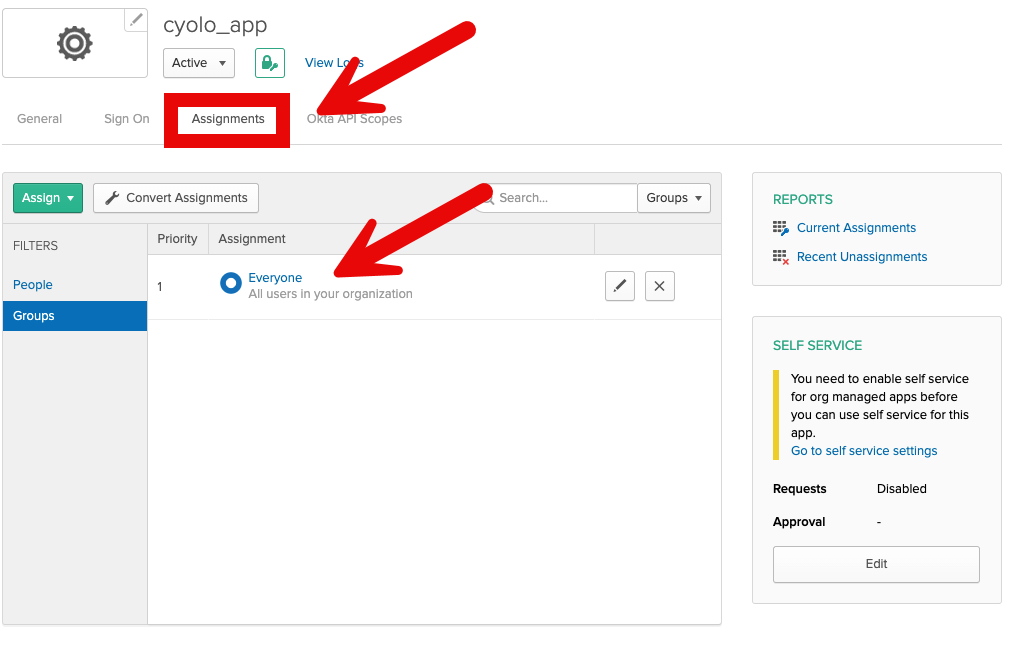
- Select the Assignment tab and add the users and groups that you want to access this application.
In this example, all users in the organization are selected.
Advanced Configurations
In this guide, we used the default Okta configuration. For advanced usage (for example, custom name attribute), read Okta's Documentation or ask Cyolo to assist you.
Azure - Creating the Azure AD OpenID App
- Navigate to your Azure Home Page > Enterprise Applications > Create Your Own Application.
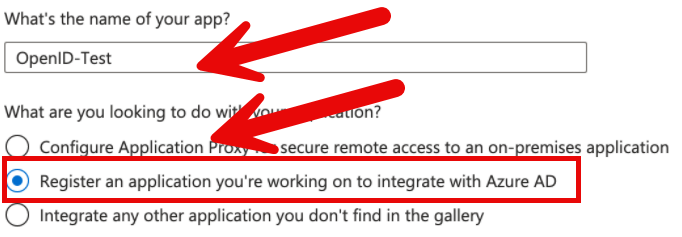
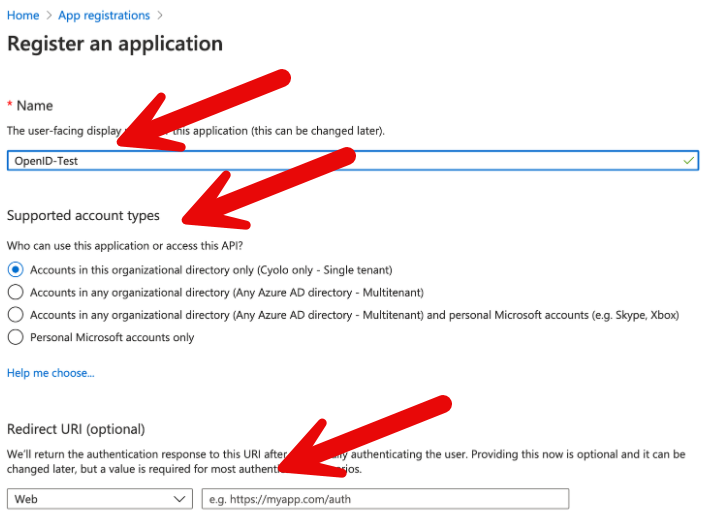
- Specify a name for your app.
- Select the option: Register an application you're working on to integrate with Azure AD.
- Click Create.
- Navigate to New Registration.
- Enter the application name.
- Select an option under Supported Account Types as appropriate.
- Enter a value for Redirect URI (optional).
- Click Register.
- Navigate to Expose an API → Set Application ID URI.
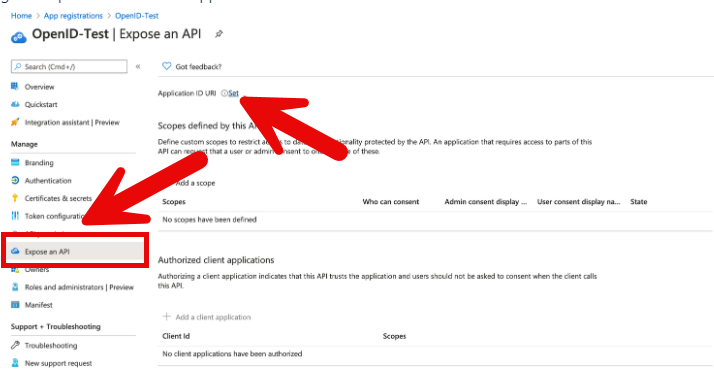
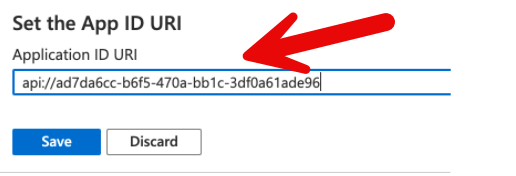
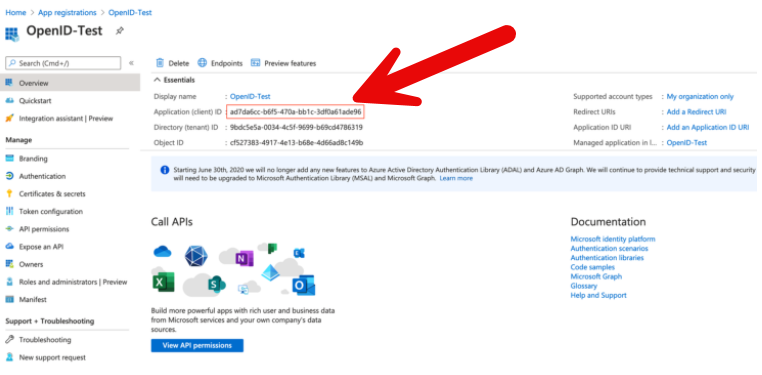
- Verify that the Application ID is the same as in the overview page.
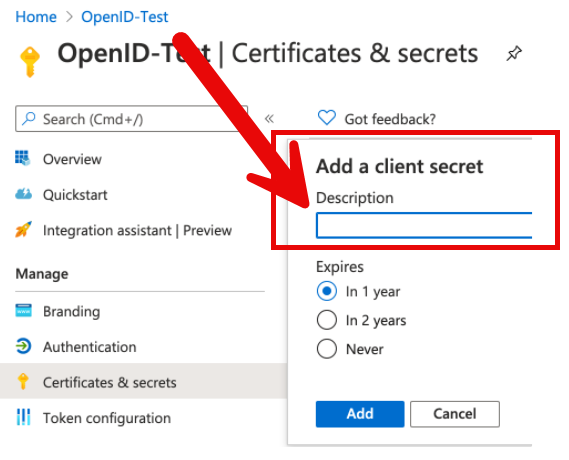
- Navigate to Certificates & Secrets > New Client Secret.
- Enter a descriptive name for the Secret and specify an expiration period.
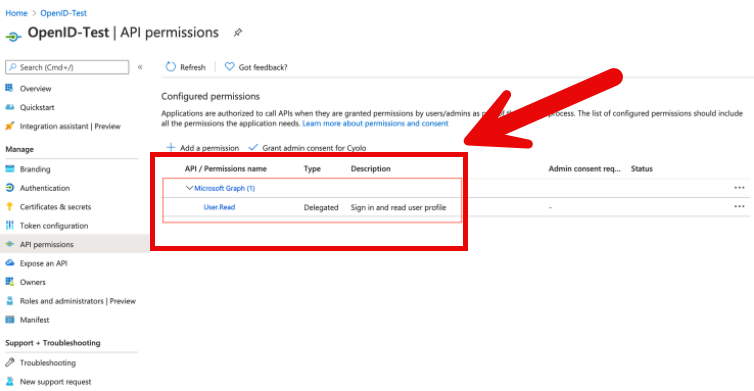
- Navigate to API Permissions and verify that you have the permission as shown in the image below.
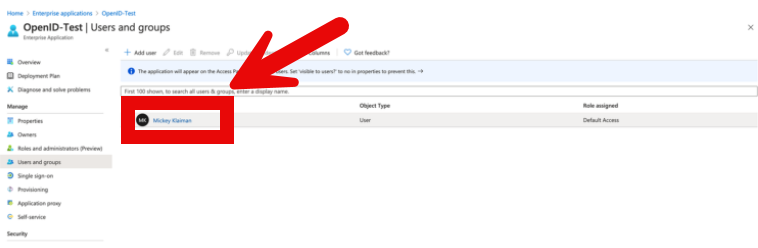
- Navigate to your Azure Home Page > Enterprise Applications.
- Search for your application name.
- Click the application name and then navigate to Users and Groups
- Add the users and groups that are allowed to log in via this app.
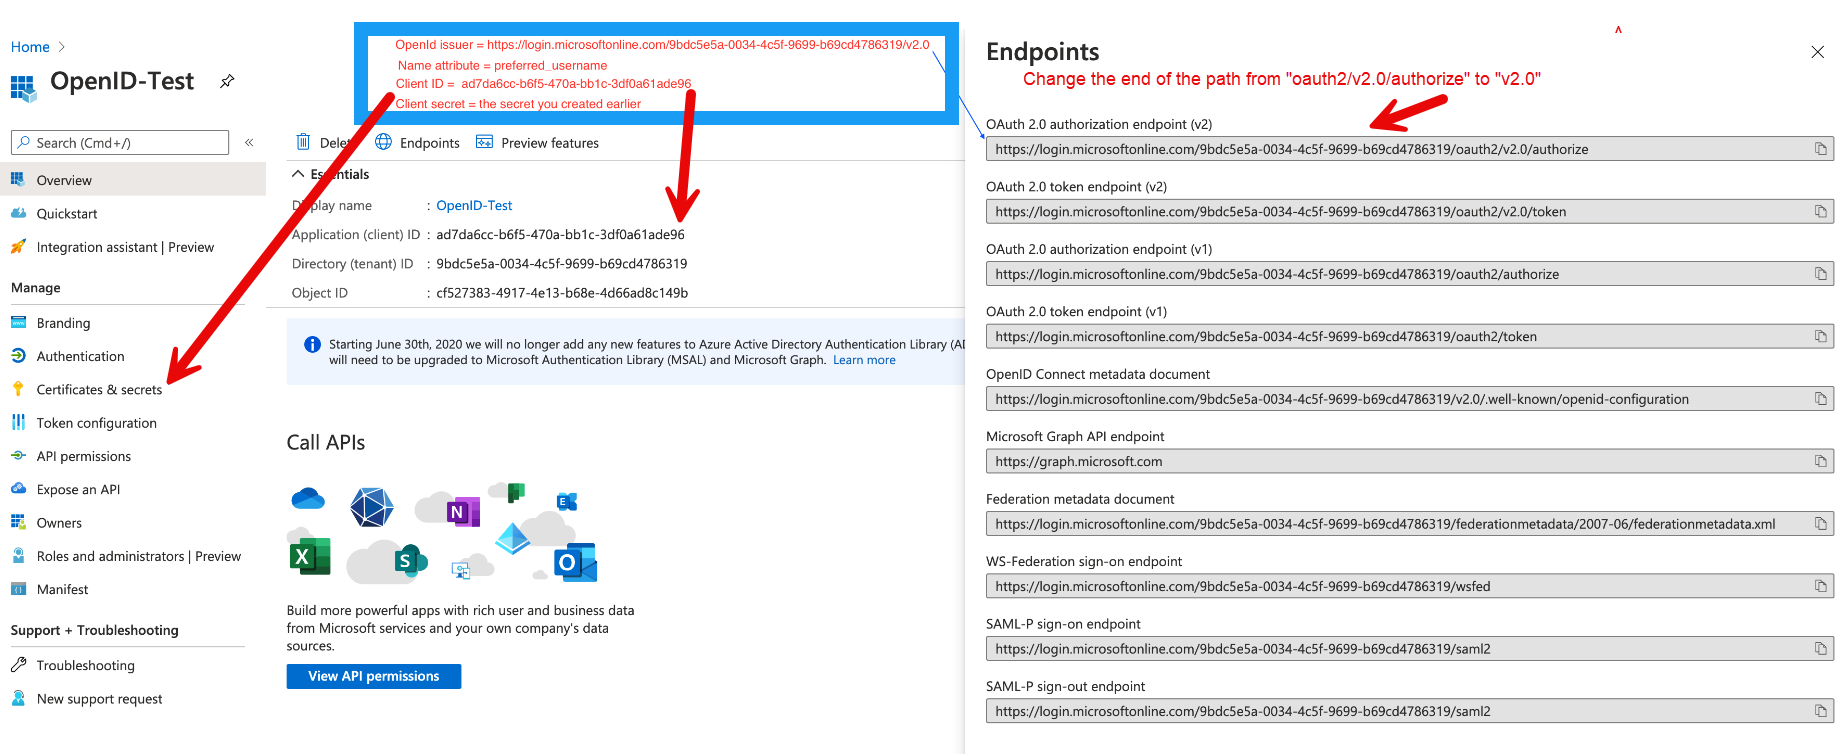
The image below shows the details you will need to enter in part 2 of the procedure.
ADFS Configuration
For the configuration in part 2 you will need the values shown in the image below.
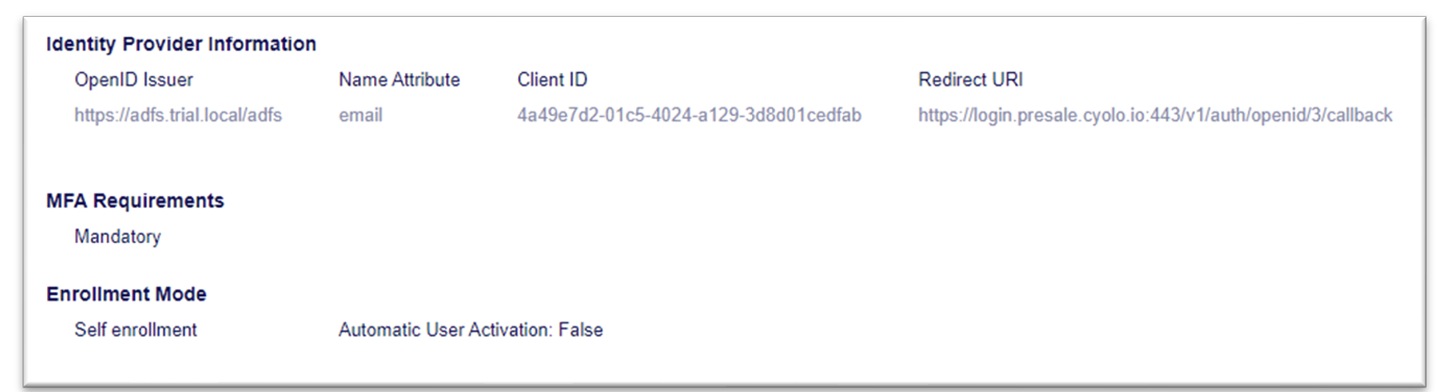
The Client ID and Secret should match the ones that you generate on a new server application in ADFS (the Redirect URI entered on the following screen is taken from Cyolo).
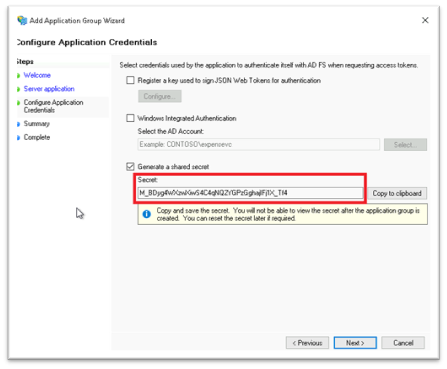
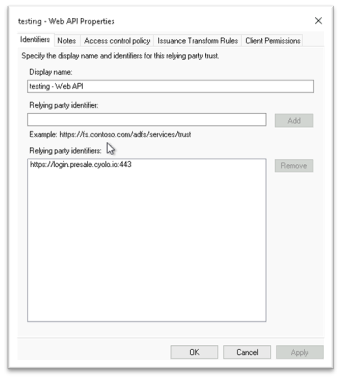
You must create a web API application on ADFS under the same application group:
Part 2: Creating the OpenID Provider in Cyolo
- In the admin console, navigate to Configuration > New Identity Provider and select the OpenID tile.
- Fill in the following details:
- OpenID Issuer:
https://<okta_tenant>.okta.com/oauth2/default - Client ID and Client Secret: Copy from the Client Credentials section of your Okta app.
- Username Attribute: Enter preferred_username.
- OpenID Issuer:
- Click Save. The generated Redirect URI will be displayed.
- Copy the Redirect URI and go to your OpenID platform settings. Ensure the generated Redirect URI matches the one you entered earlier. If not, edit it to match.
That's it. You've got it all configured.
Testing the Configuration
To test the configuration:
- Open a Chrome incognito tab and go to the Cyolo login page. A button has been added to the login page.
- Click the Continue with [Value] OpenID button and start the login process. The example shown above is for Okta.
- If you encounter an error (for example, you are stuck in the OpenID website) or if you have an unfamiliar login failure in the activity log, contact Cyolo support.