Configuring Webhooks
Overview
Webhooks are user-defined HTTP callbacks, or small code snippets linked to a web application, that are triggered by specific events. When a trigger event occurs in the source application, the webhook detects it, collects relevant data, and sends it to a specified URL via an HTTP request.
The key difference between API calls and webhooks lies in their output mechanisms: API calls are request-based, while webhooks are event-based.
See below for details on integrating webhooks in Cyolo with third-party systems (via API) to use them as Policy conditions.
Webhook Configuration with GET Method
To integrate a new webhook with GET method:
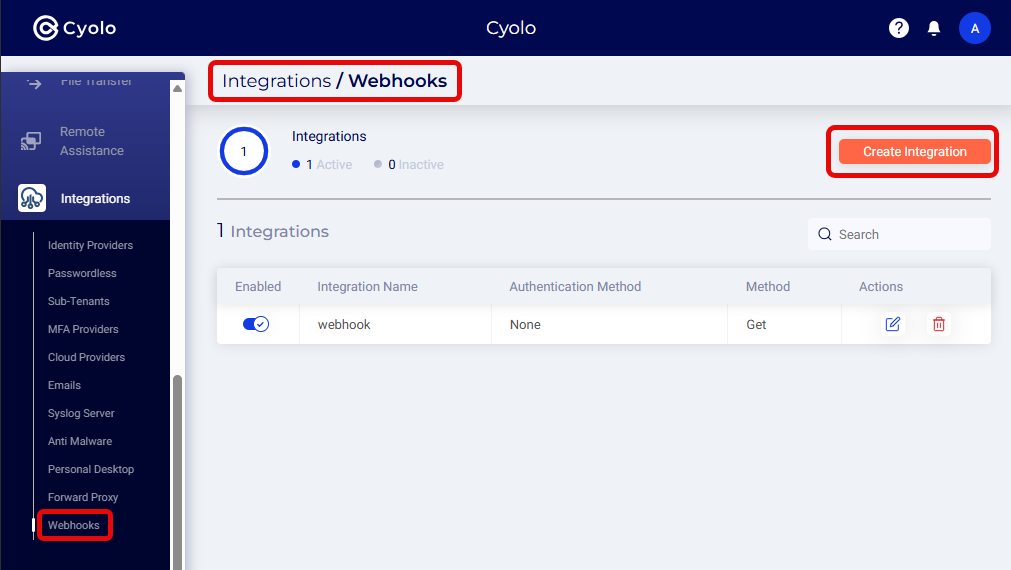
- In the Admin console, fromIntegrations > Webhooks select Create Integration.

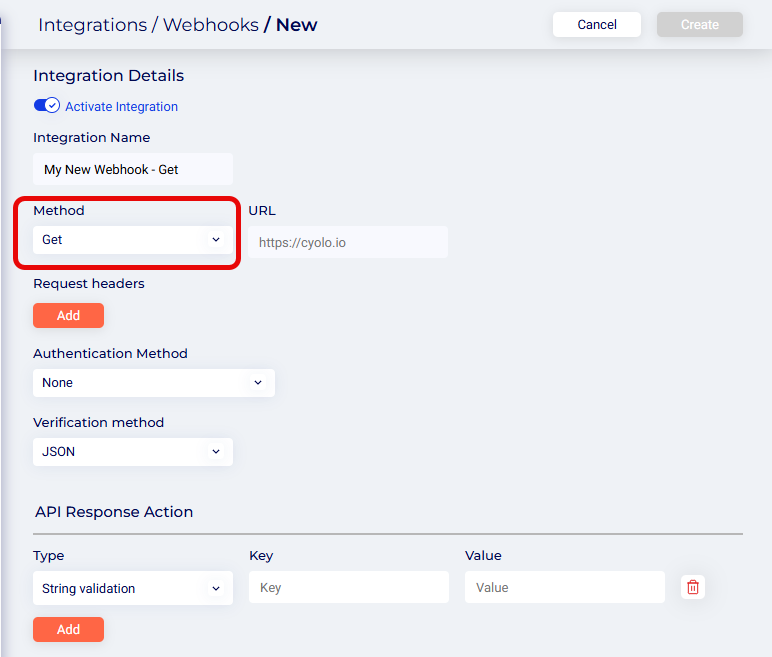
- Type the Integration name.

- For Method, select GET.
- Enter the URL.
- Click Add under Headers and enter the header's Key and Value.
- You can add as many headers as you’d like.
- You can use static headers or include parameters (%param%) from the client request. See Parameters for Headers and Body below.
- Select an Authentication Method:
- None
- Basic: Enter username and password
- OAuth: Token URL, Client ID, Client Secret
- Select a Verification method:
- JSON
- JSONP
- Click Add under API Response Action and enter details for Type, Key and Value. (You can add multiple API Response Actions.)
- Click Create to save the webhook integration.
Activating Webhook IntegrationNow that you have integrated a webhook you can use it as part of a Policy's access parameters , under External Integrations.
Webhook Configuration with Post Method

To integrate a new webhook with POST method:
- In the Admin console, fromIntegrations > Webhooks select Create Integration
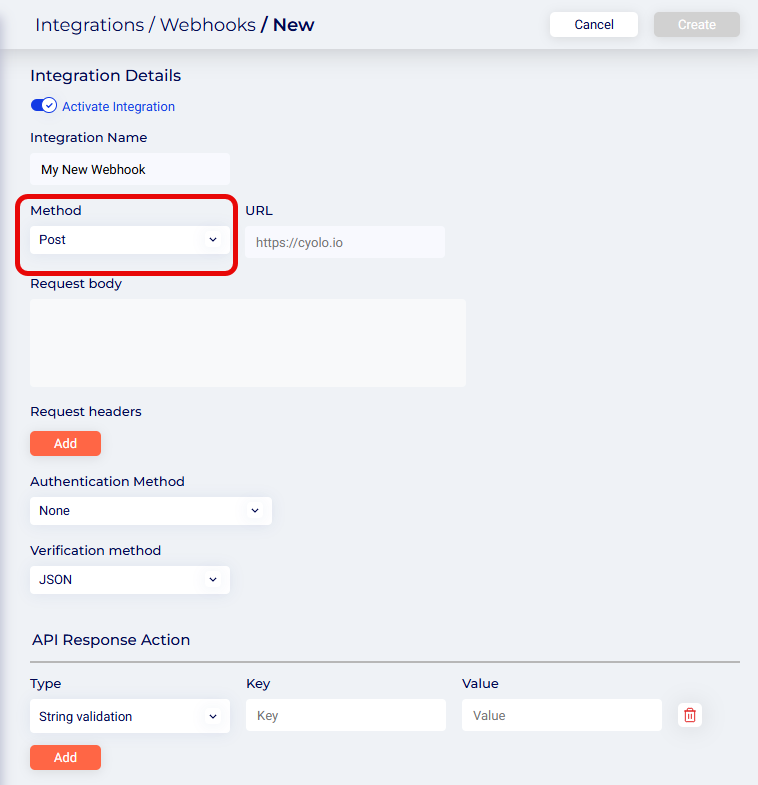
- Type the Integration name.
- For Method, select POST.
- Enter the URL.
- ClickAdd under Headers and enter the header's Key and Value.
- You can add as many headers as you’d like.
- You can use static headers or include parameters (%param%) from the client request. See Parameters for Headers and Body below.
- Select an Authentication Method:
- None
- Basic: Enter username and password
- OAuth: Token URL, Client ID, Client Secret
- Select a Verification method:
- JSON
- JSONP
- Click Add under API Response Action and enter details for Type, Key and Value. (You can add multiple API Response Actions.)
- Click Create to save the webhook integration.
Activating Webhook IntegrationNow that you have integrated a webhook you can use it as part of a Policy's access parameters , under External Integrations.
Parameters for Headers and Body
- In POST webhooks parameters can be used in the headers and body.
- In GET webhooks parameters can be used in headers.
The supported webhook parameters are:
- %username%
- %internal_addr%
- %user_agent%
- %remote_ip%
- %cert_thumbprint%
- %cert_thumbprint_upper%
- %cert_thumbprint_256%
- %cert_thumbprint_256_upper%
- %cert_name%
- %cert_alt_name%
- %device_id%
- %groups%
- %group_names%
- %headers.XYZ% - sending the value of a specific header (e.g. headers.Accept-Language, headers.Authorization)
Note: for parameters of type cert you must set an application conditionto request the device certificate.

Troubleshooting
Please note that there is no autocomplete option when filling in the parameters (%param%).
Logs
- Creation, deletion and editing of webhooks are recorded in Logs > Activity.
- If access was denied based on failure to meet the webhook criteria, this will be indicated in the status column.
Updated 5 months ago