How to Create User Groups
Group Types
Groups in Cyolo facilitate how administrators control which identities can access applications. Instead of allowing access to individual users, administrators can allow access to groups.
There are three types of groups:
- Cyolo Groups - Administrators can create Cyolo groups and assign users to those groups. Cyolo groups are not linked to any specific IdP and are static (the system does not change their members, only administrators).
- External Groups - When the IdP's automatic provisioning option is enabled, the system creates external groups upon SCIM requests arriving from the IdP, or during the polling cycle to LDAP-based IdP.
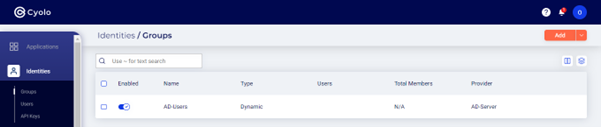
- Dynamic Groups - Administrators can create dynamic groups on a specific external IdP. Upon user logins, the system receives the user’s attributes from the external IdP, and - based on the configured attribute and value - dynamically join the user to the dynamic group. The system does not persistently store the user group membership like it does for “Cyolo Groups” or “External Groups”.
Prerequisites
- For an overview of the Identities feature, refer to the section: Identity Management.
Configuration
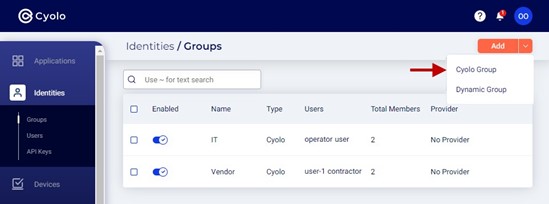
Add a Cyolo Group
● Log in to the Cyolo Admin Portal.
● Navigate to Identities > User Groups.
● Click Add in the top right corner.
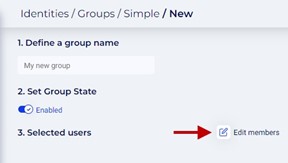
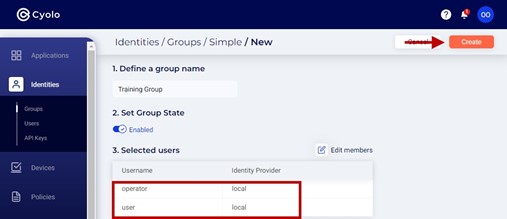
In the New window, enter the following information in each field:
-
Define a group name – Enter a name for this group.
-
Set Group State – The toggle button allows you to set the status of the group to enabled or disabled. It is enabled by default.
-
Selected users – Click Edit members.
-
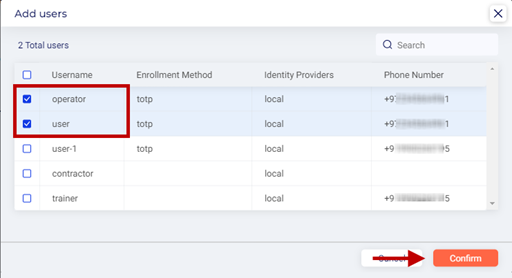
In Add users, enable the checkbox for each user to add the user to the group.
-
Click Confirm.
-
Click Create.
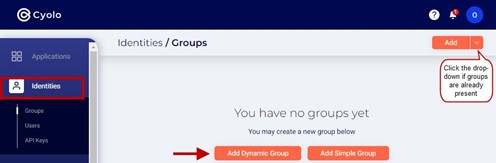
Add a Dynamic Group
You must configure at least one external IdP must be configured on Integrations > Identity Providers before creating a dynamic group. Refer to the section on integrating external IdP to the Cyolo platform: Configuring LDAP Integration.
● Click the drop-down alongside the Add button and select Dynamic Group.
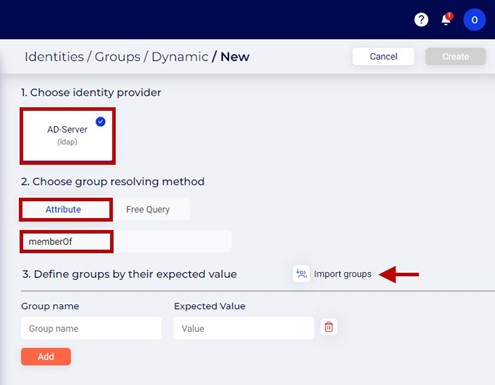
● Choose identity provider - The identity providers integrated with the Cyolo platform will be displayed at the top. Select the IdP for this configuration. In this example there is only one, LDAP, which is selected by default.
● Choose group resolving method – Choose the method to locate the group:
- Attribute – Enter the attribute of the group in the IdP. For example, memberOf.
- Free Query -
● Click Import Groups.
- Free Query -
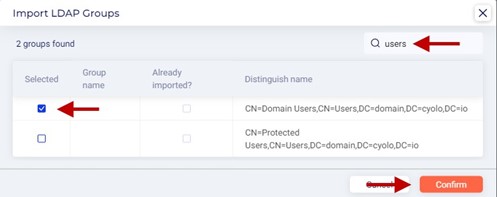
● In the Import LDAP Groups window, enter the name of a group in the search box.
● Select the group from the groups displayed.
● Click Confirm.
- Define groups by their expected value – Enter the name of the group to be imported and its identification value within the external IdP. For example, in the case of LDAP, it is DN.
- Group name - Set a local name for this dynamic group.
- Expected Value - CN=Domain Admins, CN=Users, DC=example, DC=com
- Click Add.

● Click Add in the top right corner.